
Mastering the MailChimp-WordPress Integration for Effective Email Marketing

The Ultimate WordPress Playbook: Mastering the Art of Crafting and Refining Blog Posts
June 21, 2023
How to Increase max_input_vars in WordPress
March 24, 2024
1. The Business Imperative: Why Use MailChimp with WordPress?
In the ever-evolving digital landscape, businesses must prioritize consistent and personalized communication with clients. Integrating MailChimp with WordPress addresses this necessity, setting the stage for more effective and engaging email marketing campaigns. As an email marketing provider, MailChimp equips you with tools to manage subscriber lists and orchestrate ongoing marketing strategies. The goal? Maximizing return on investment through conversion-generating messages.

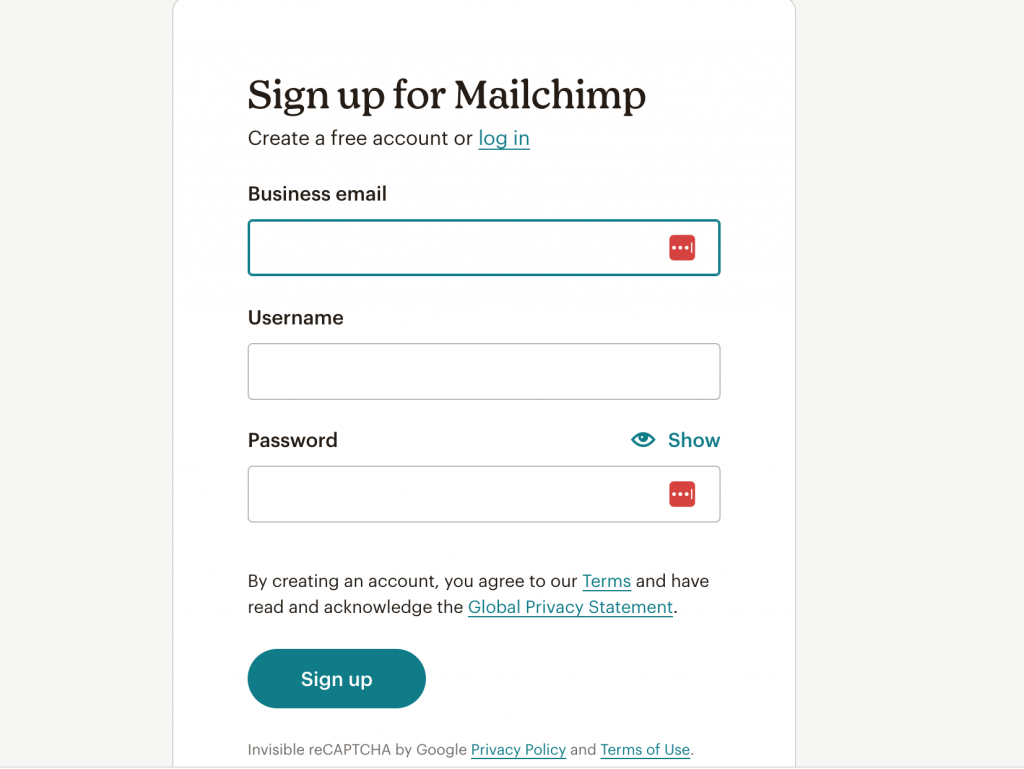
2. Kick-starting the Process: Registering a MailChimp Account
To begin integrating MailChimp with WordPress, you first need to register a MailChimp account. The registration process involves providing a unique username, a valid email address, and a strong password. Make sure to confirm your email address promptly after signing up to avoid any potential functionality issues.
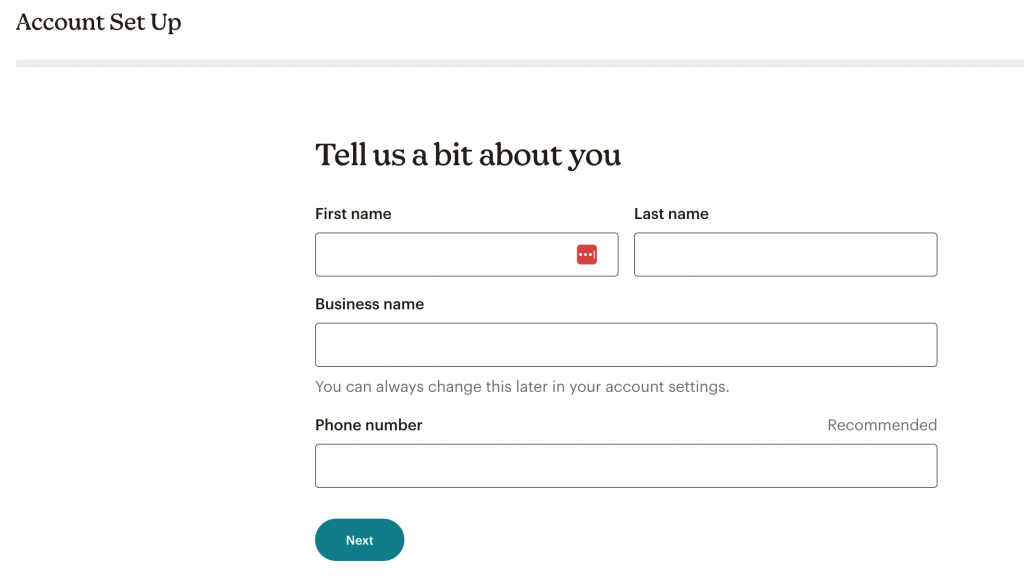
3. Personalizing Your Account: Setting Up MailChimp
Once registered, log in to your MailChimp account to complete the setup process. This involves providing specific information, including your name, valid email ID, company details, website URL, and physical address. Each piece of information plays a role in personalizing and enhancing your email marketing campaigns.
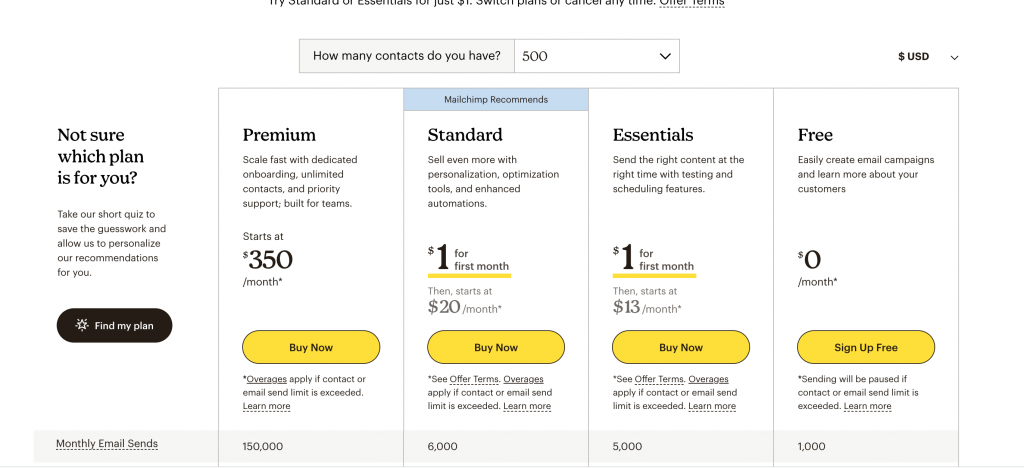
4. Selecting Your Plan: Choosing Your MailChimp Package
MailChimp offers both free and paid packages. By default, you start with a free package upon account creation. If the free plan’s capabilities align with your business’s needs, proceed to connect it with your WordPress site. However, if your needs exceed what the free package offers, consider upgrading to a paid plan.
5. Building Your Audience: Creating an Email List
The next step involves creating an email list, the foundation of your email marketing campaigns. You can import an existing list of contacts or manually add individual contacts to your list. Either way, the goal is to create a robust audience for your marketing initiatives.

6. Bridging the Gap: Installing the MailChimp WordPress Plugin
To make the most of MailChimp’s features on your WordPress site, you’ll need to install the MailChimp WordPress plugin. This tool helps bridge the gap between your website and MailChimp, enabling smooth functionality and more robust integration.

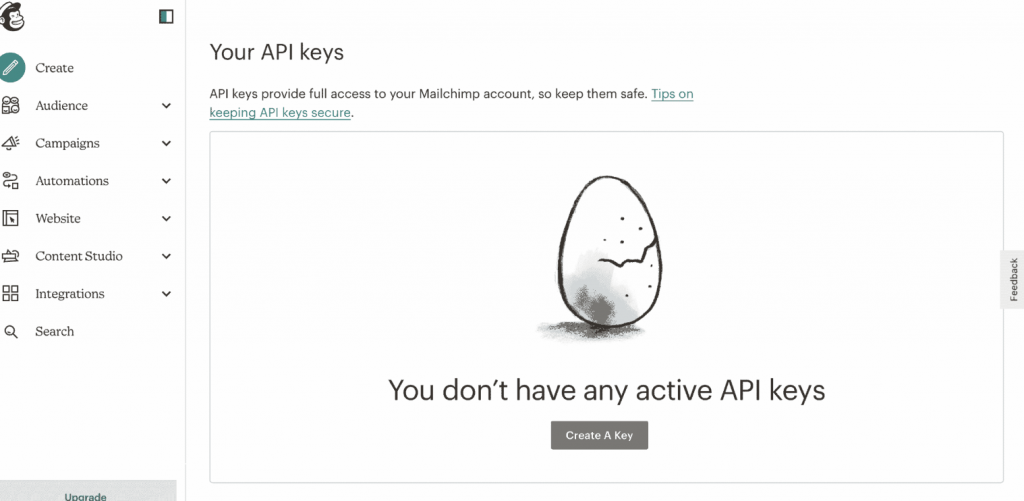
7. Linking MailChimp and WordPress: Generating an API Key
Creating an API key is crucial in establishing a connection between MailChimp and your WordPress site. This key enables you to access forms and lists on your site, paving the way for seamless integration and enriched website functionality.
8. Engaging Your Audience: Creating MailChimp Forms for Your WordPress Website
Upon successful installation of the MailChimp plugin and generation of an API key, you can create and add MailChimp signup forms to your WordPress site. Depending on your marketing objectives and user experience preferences, you can opt for various form types, including inline-block, sidebar signup, and pop-up forms.

9. Realizing the Potential: Leveraging MailChimp for WordPress
With MailChimp integrated into your WordPress site, you can streamline your email marketing processes and bolster your client communication strategies. Whether it’s setting up an automatic newsletter or running targeted marketing campaigns, MailChimp for WordPress offers a one-stop solution for your business communication needs.

Daniel Lopez
Related posts

Photo by Pixabay on Pexels.com
